The previous article introduces into HDMI grabbers on Linux.
When is latency relevant?
My first use case was to play a game on a device like the Nintendo Switch, with the HDMI output only visible via grabber. While playing with various options and software, I needed a way to nicely measure the latency between the HDMI signal output, and the picture displayed on my screen. How to do that? Best is to show the current time, sufficiently accurate, on both
- shown by the HDMI source
- and shown by your displaying system.
With latency in seconds range, you can then directly read the latency.
When coming down to centiseconds, you need a screenshot:
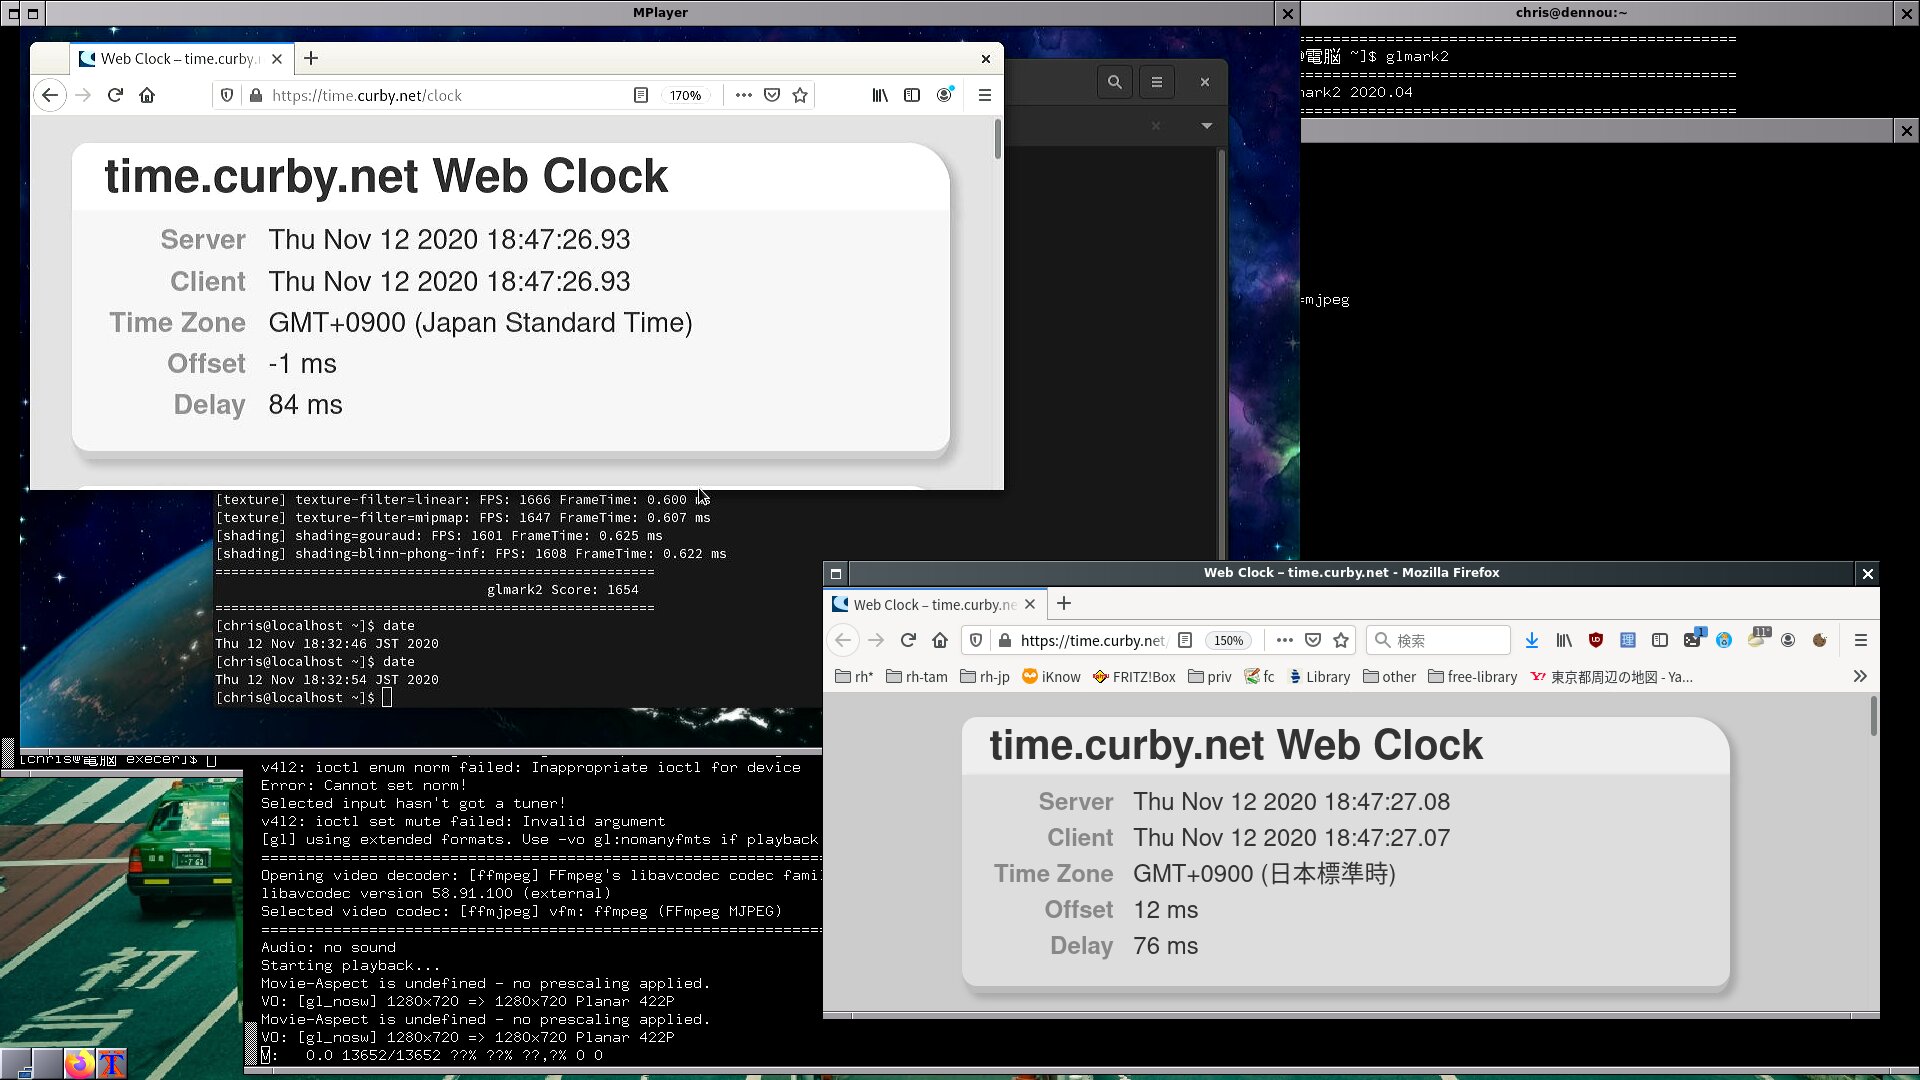
So with this, we can optimize for low latency when displaying locally.
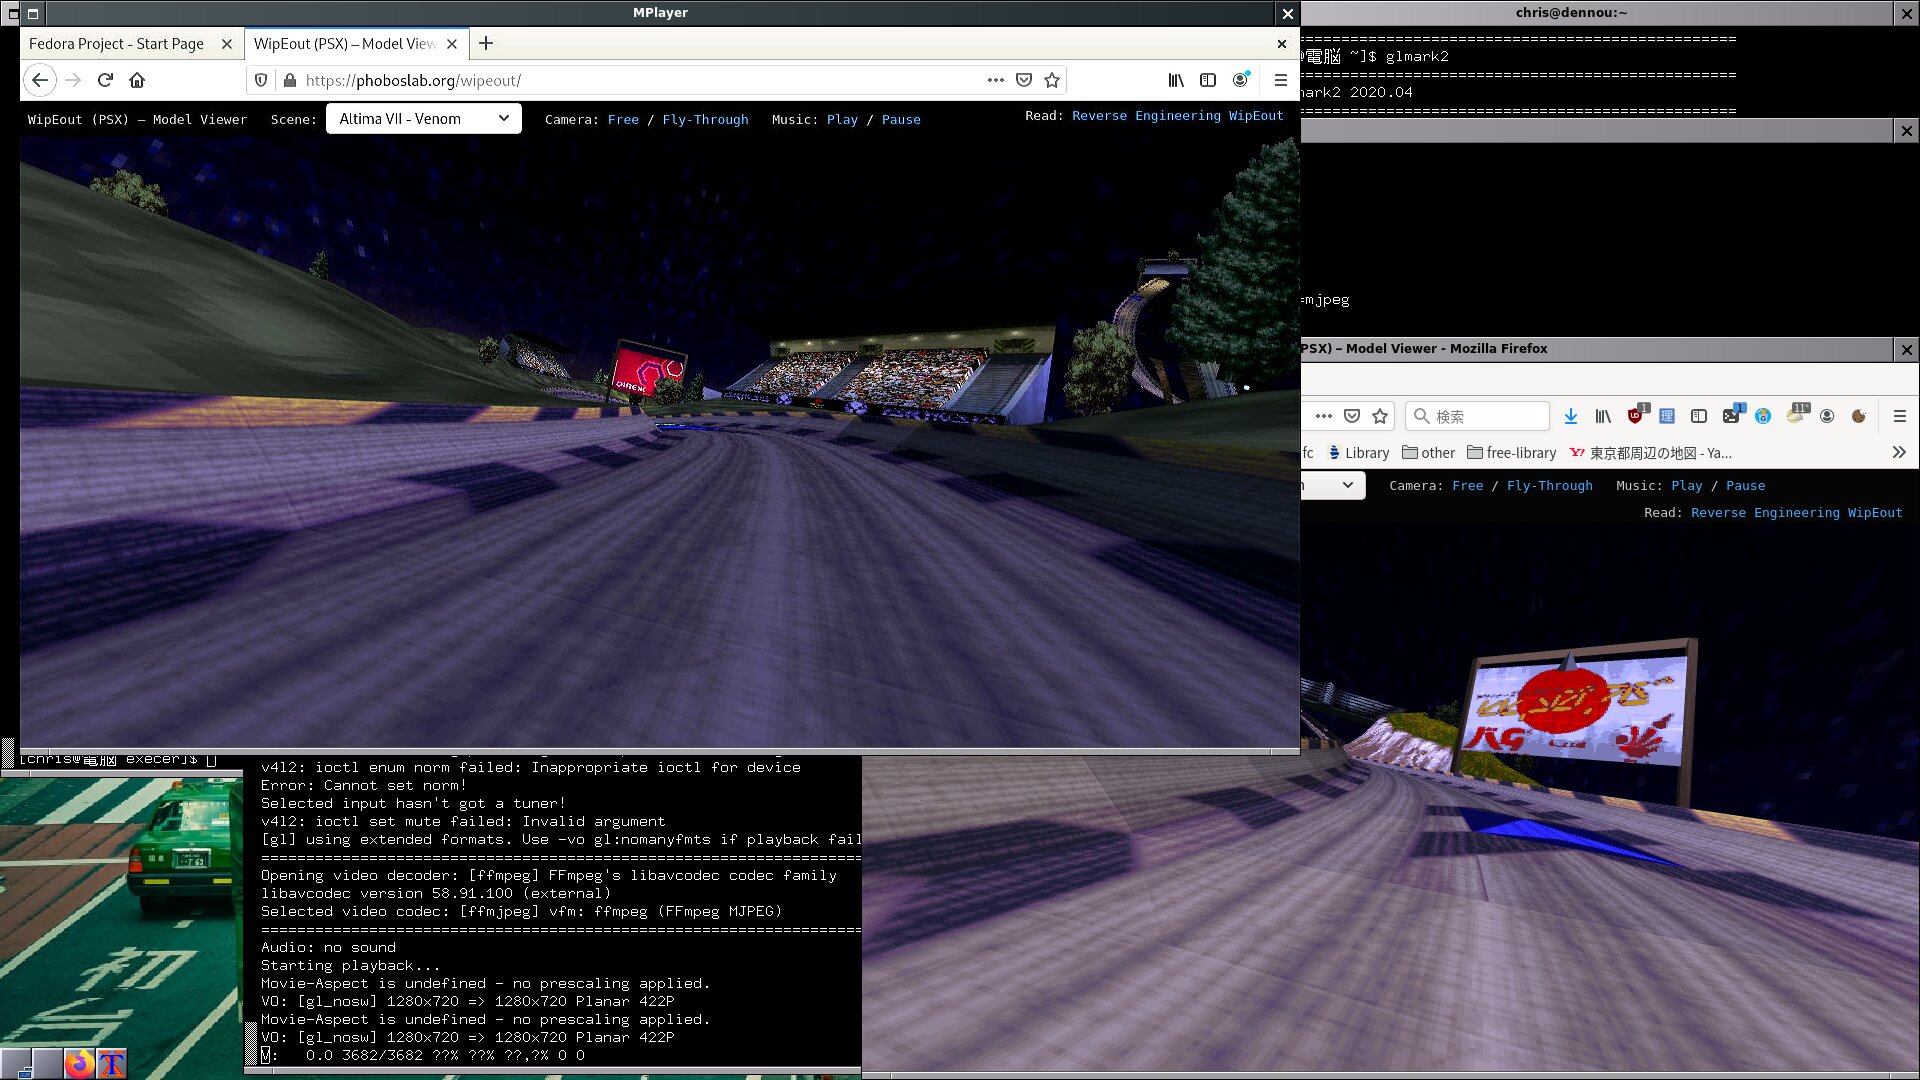
How ‘smooth’ is it?
That is a different goal than ’low latency’ of course. For this, you can allocate bandwidth, user a buffer on the receiver side, and get nice results. For comparison I opened wipeout webgl on both the system providing the HDMI stream and the local system in parallel.
Easy streaming
The wiki pages have various approaches for streaming to single systems, but how to do that at scale, for multiple clients? owncast is really nice for this, OpenSource.
Our streaming setup has these components:
- a system on the internet, where we will run Owncast. Should not be behind a NAT, so incoming packets make it to the system. ffmpeg 4.1.5 or later is required. I use a KVM system running Debian 10, which comes with ffmpeg 4.1.6.
- a system where the usb-grabber is connected to, Fedora 33 for me.
ffmpeg needs to be installed. - the HDMI source
First, we setup our system with good internet connectivity, acting as the server.
mkdir /opt/soft/owncast-0.0.2-linux-64bit
cd /opt/soft/owncast-0.0.2-linux-64bit
wget \
  https://github.com/owncast/owncast/releases/download/v0.0.2/owncast-0.0.2-linux-64bit.zip
unzip owncast-0.0.2-linux-64bit.zip
vi config.yaml
# customize at least the streamingKey
./owncast
Next, we configure our streaming system. It has the USB-grabber connected and will send the stream to the server we just configured. This assumes /dev/video2 as video device, and that hw:1,0 is the alsa device from the grabber.
ffmpeg -f alsa -ac 2 -i hw:1,0 -thread_queue_size 64 \
  -f v4l2 -framerate 60 -video_size 1280x720 -input_format yuyv422 -i /dev/video2 \
  -c:v libx264 -preset veryfast -b:v 1984k -maxrate 1984k -bufsize 3968k \
  -vf "format=yuv420p" -g 60 -c:a aac -b:a 128k -ar 44100 \
  -f flv rtmp://<ip-of-your-server>/live/<your-streaming-key>
With that, we can have browsers on clients access the owncast instance:
<server-ip>:8080
If that works, you should next read up on customizing the owncast instance and consider to tune the ffmpeg options of your grabber-system.
Use cases and good approaches
| Use case | You might want to look into.. |
|---|---|
| Low latency display locally | mplayer |
| Streaming over LAN, single viewer | µStreamer |
| Recording to file | 6by9 yavta, µStreamer |
| Stream over Internet, many clients | Owncast, ffmpeg |
| Remote hands solution | TinyPilot |
Last modified on 2020-11-13